Do It YourSelf
Build your own ADS-B Radio Receiver in just a few steps!
The ADS-B Radio Receiver
Most commonly based on a Raspberry Pi
The minimum hardware requirements include a compact, low-cost single-board Linux computer, an SD card to store the operating system on, and an RTL-SDR USB dongle radio receiver equipped with an antenna. Total costs +/- 70 to 100 USD depending on how nice you want to make it look. Although there are macOS versions of dump-1090 out there which could run on your computer, the more stable and always-on solution, and a better supported one, is to use a dedicated low power linux device like a Raspberry Pi.
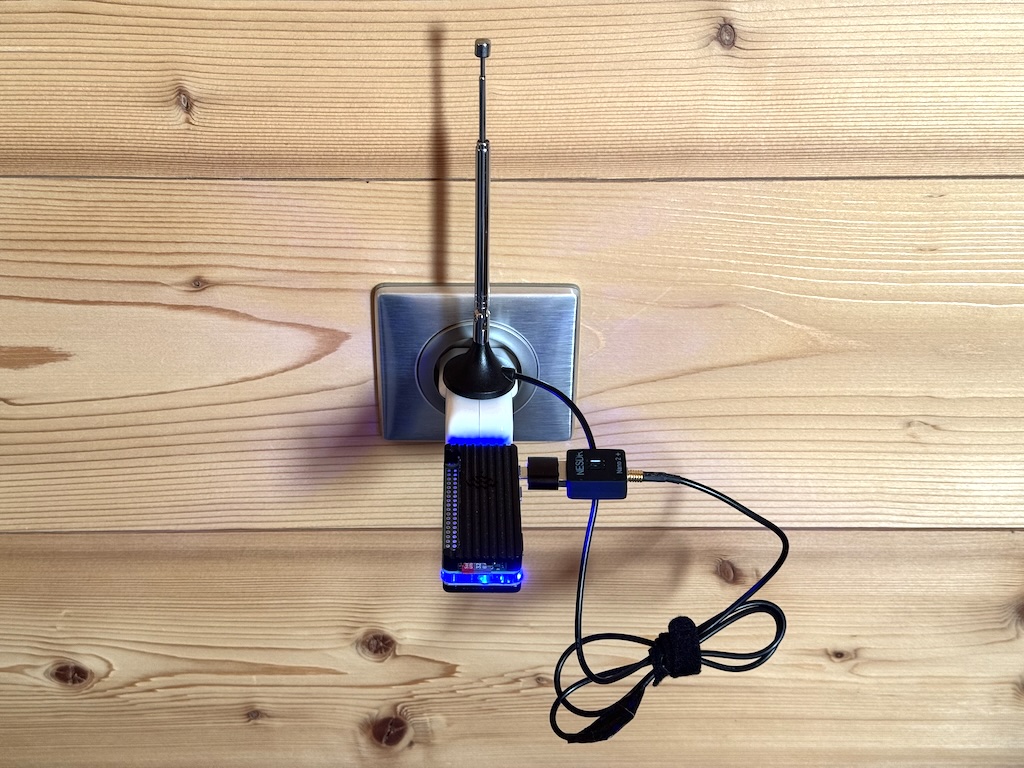
Raspberry Pi Zero W2 + Dongle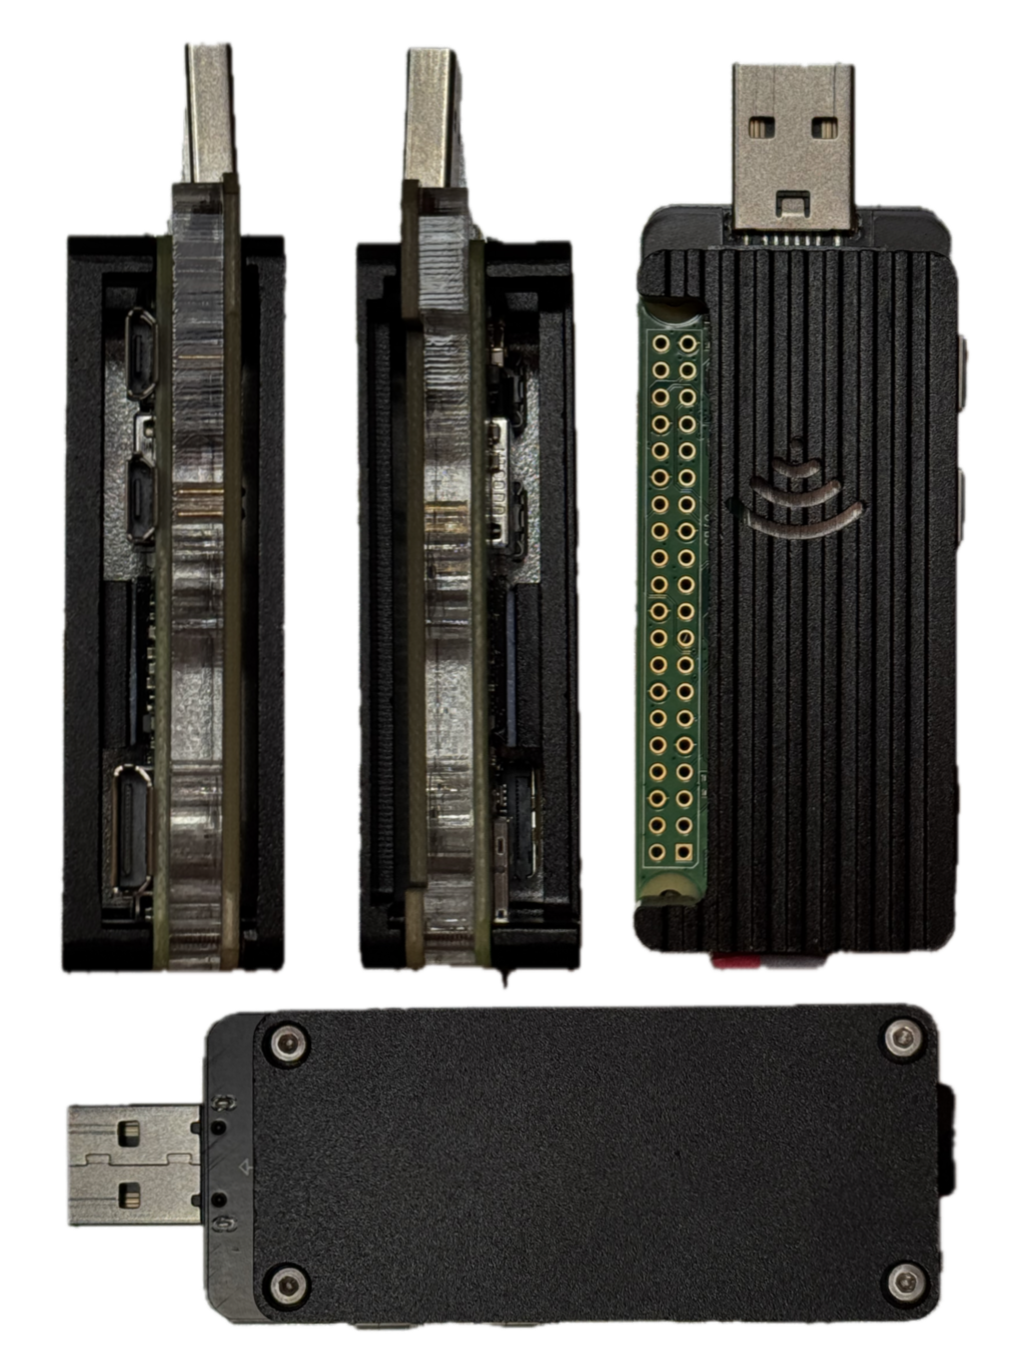
A powerful, small, wifi enabled mini computer
A wide range of housings are available for the Pi Zero W. In this example, we opted for a “Dongle” setup, which allows for convenient connection to any USB power outlet. Additionally, an aluminium case was utilised to enhance heat dissipation and for a great look. Hardware used:
| Pi Zero W2 | USD 20 |
| MakerFun USB Dongle Pi Zero W | USD 15 |
| Aluminium Case & Cables | USD 12 |
| 4x M2x12 Hex Screws (extended length) | USD 1 |
| Sandisk 32GB microSDHC card A1 Class 10,U1 | USD 12 |
| RTL-SDR Dongle | USD 40 |
Step 1: Raspberry Pi Imager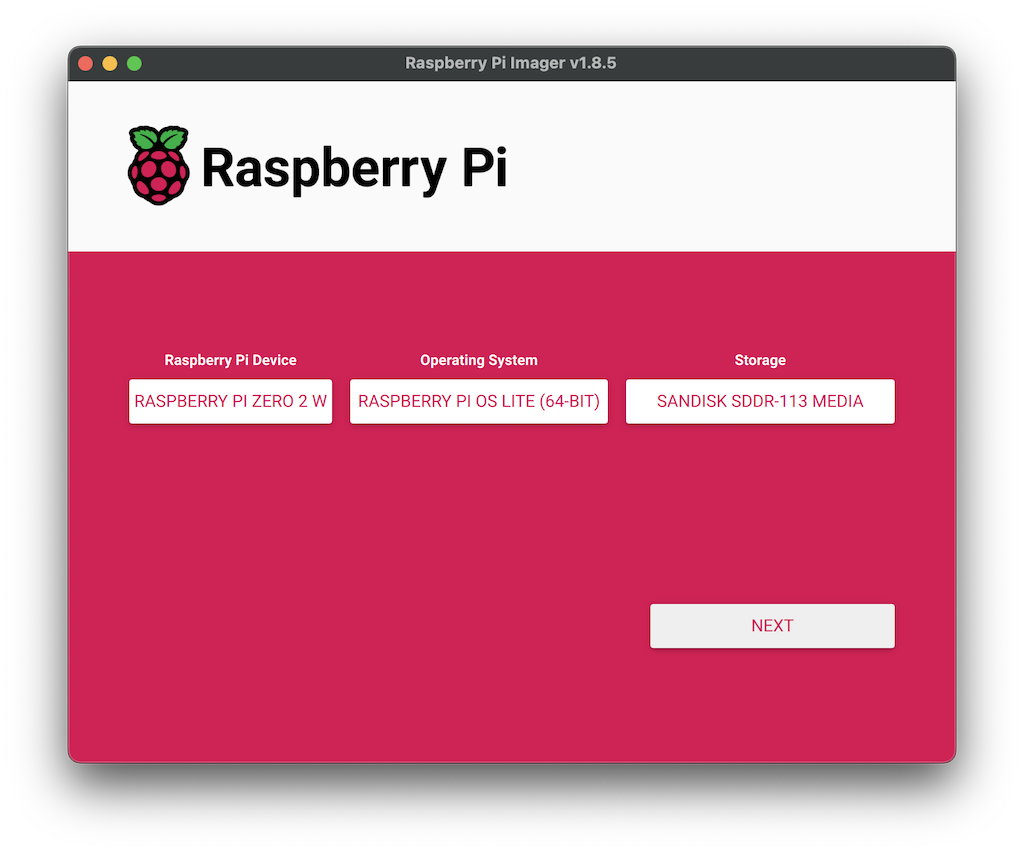
Prepare the Operating System
Use the macOS App Raspberry Pi Imager to install the OS quickly and effortlessly. Insert the SD card in a card reader and connect to your mac. Select the device: Pi Zero 2W, the OS: Under Raspberry Pi OS (Other), select Lite 64-bit no desktop, for Storage: Select your USB connected micro SDHC card and click Next.
Step 2: OS Customisation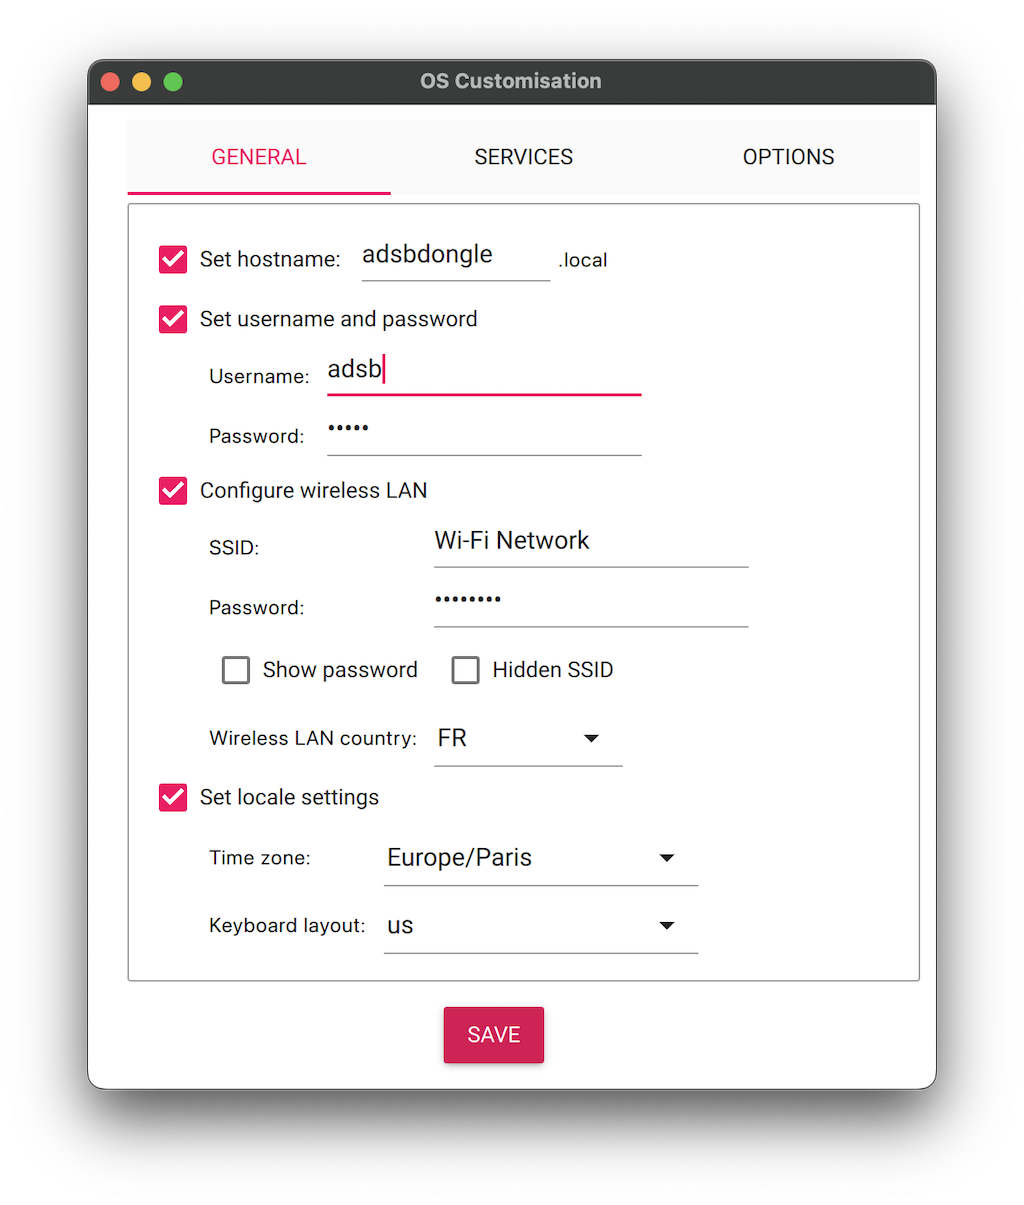
Configure Wifi & SSH
Click the option "Edit Settings" to provide the general settings, the hostname, a username & password, the Wifi network and password, and the timezone. Click "Services" to enable SSH so you can access the dongle from the macOS Terminal App. Click "Save" and click "Yes" to apply the customisation settings. All Data will be erased from the SD card, click "Yes" to continue and wait until the SD card is ready. Insert the SD card in the Raspberry Pi and power it up (do not connect the RTL-SDR dongle yet, we will do that later).
Step 3: macOS Terminal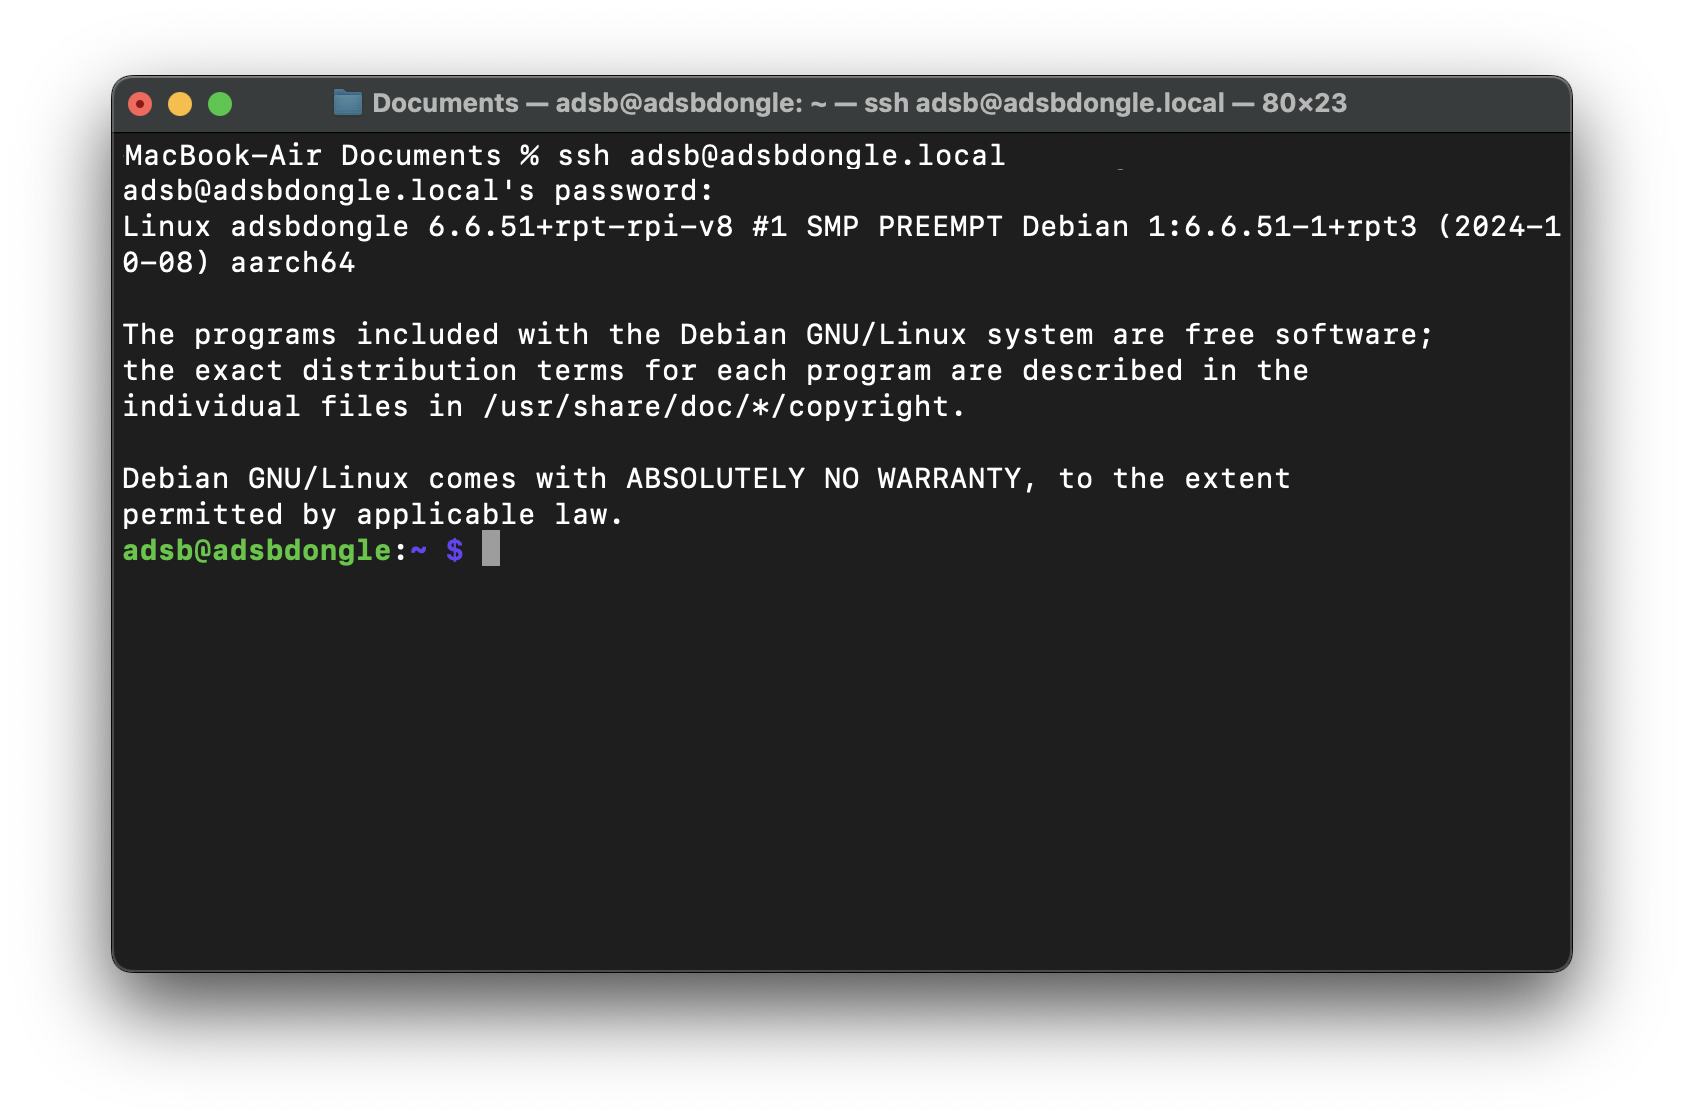
Log into your ADS-B Radio Receiver
Once the Raspberry Pi has fully "booted", open the Terminal App on your mac and enter the following command using your previously configured username and hostname (in our case 'adsb' and 'adsbdongle'):
ssh adsb@adsbdongle.local
Should it fail, look for the IP address of the Raspberry Pi in your network, use the command: arp -a, and instead of the hostname, try to use the IP address: ssh adsb@192.168.1.100
With a successful connection confirm with "yes" to add the Raspberry Pi to the known SSH hosts. Should you get a message "WARNING: REMOTE HOST IDENTIFICATION HAS CHANGED!", enter the following command to remove older keys from your system (use your hostname):ssh-keygen -R adsbdongle.local and try to connect again.
Step 4: Install Dump1090-fa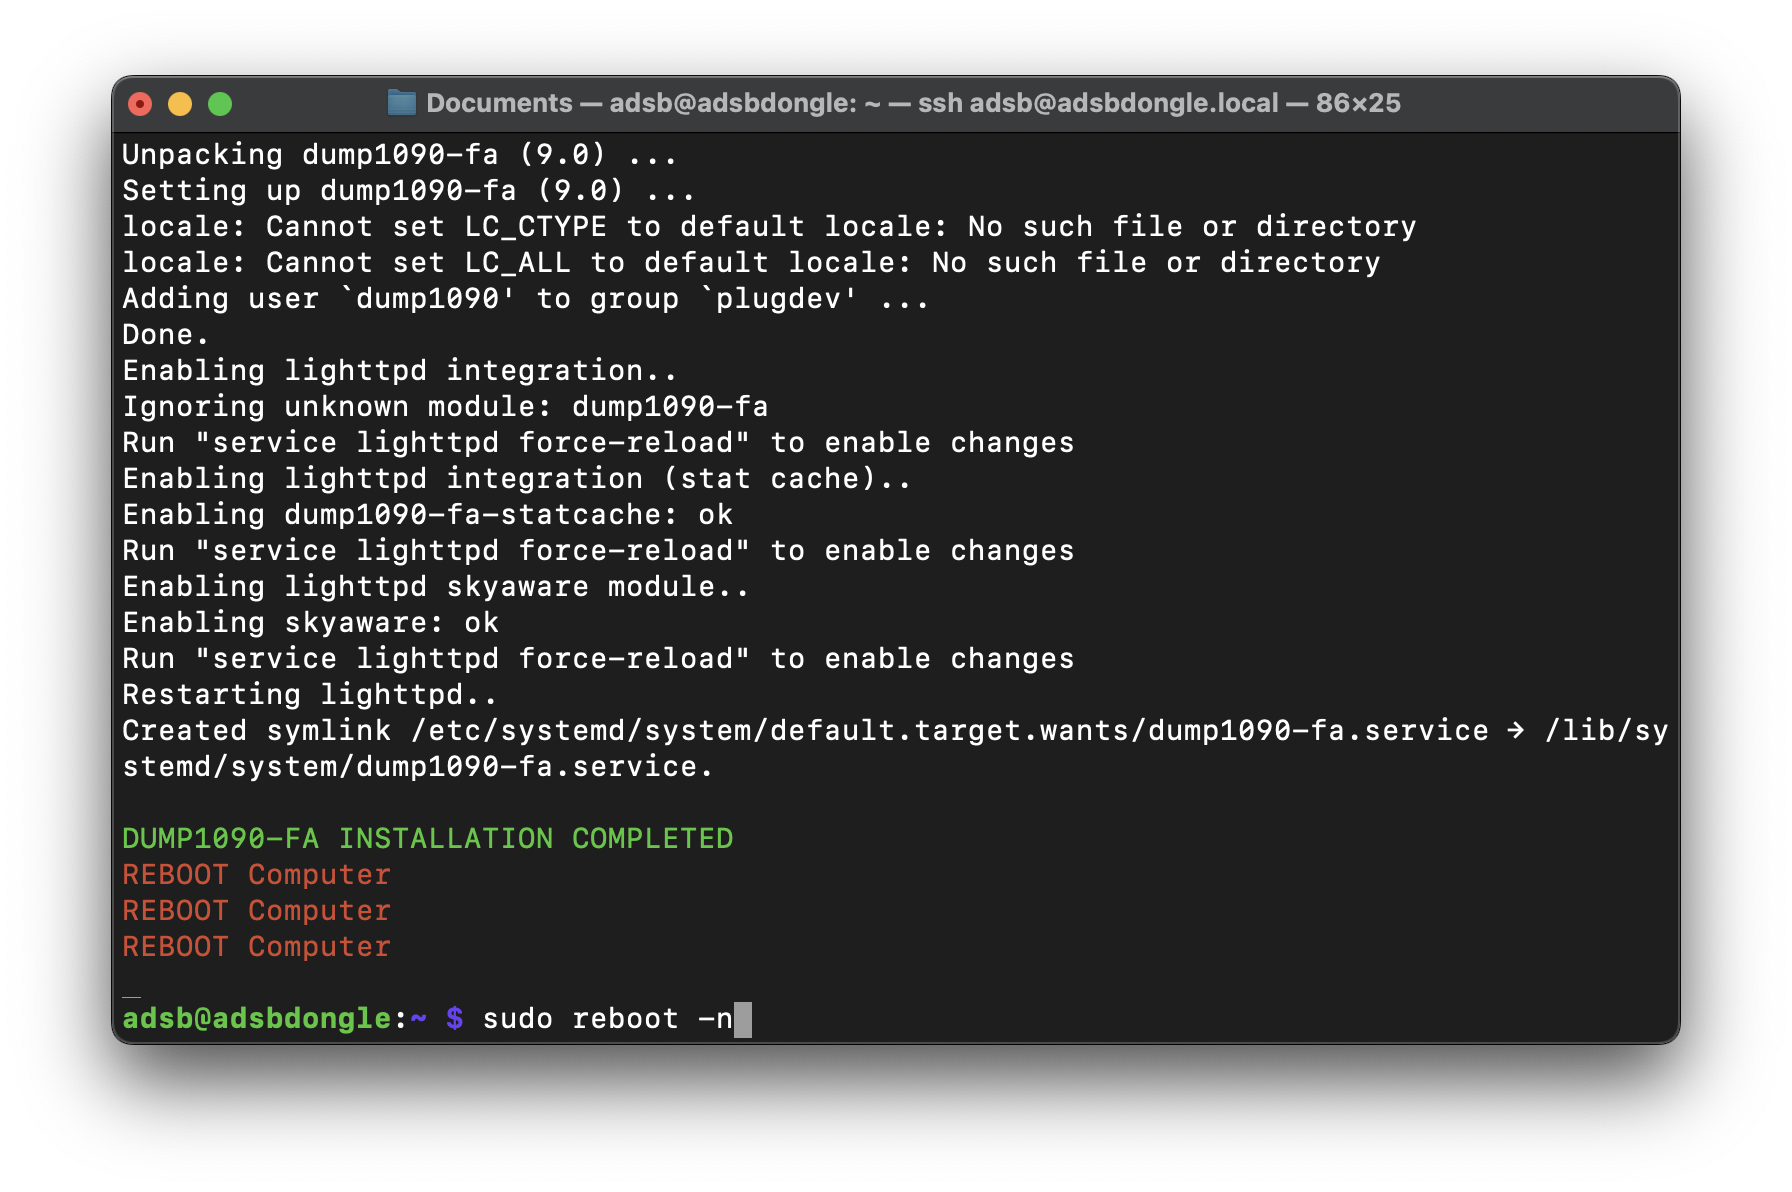
Use github for an easy install script!
Enter the following command in terminal:
sudo bash -c "$(wget -O - https://raw.githubusercontent.com/abcd567a/piaware-ubuntu-debian-amd64/master/install-dump1090-fa.sh)"
This excellent script will update your Raspberry Pi installation and install all required dependencies. It will take a while to run and install, be patient. Once completed, reboot the Raspberry Pi: sudo reboot -n
Step 5: Finalise and verify the installation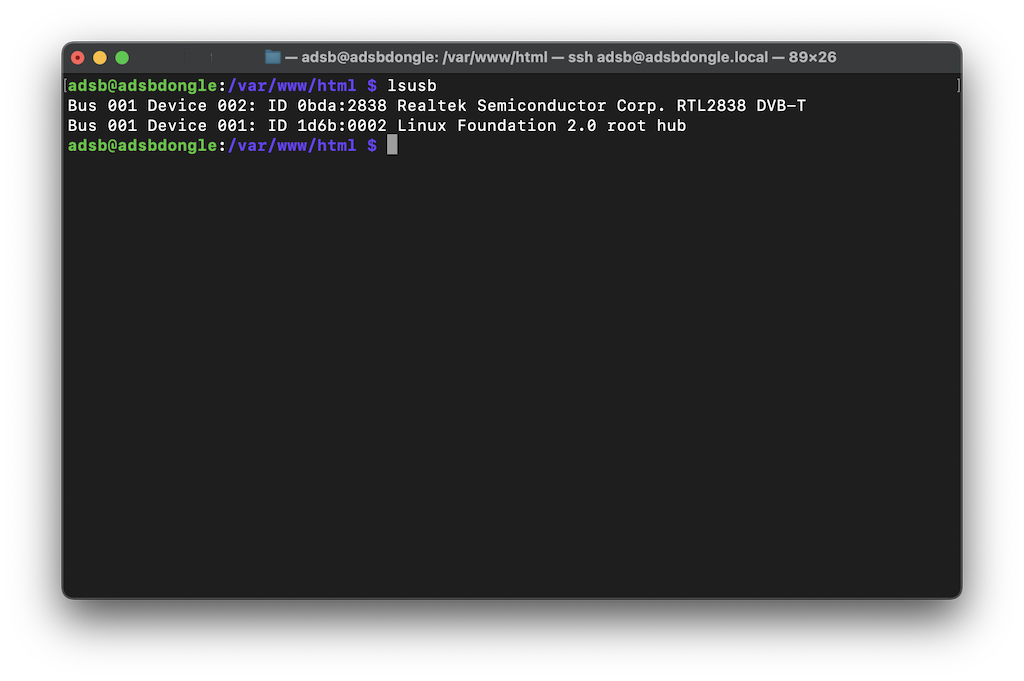
Double check it's all working
Connect the RTL-SDR dongle to the USB port and check if it is recognised by listing all USB devices with this command:
lsusb
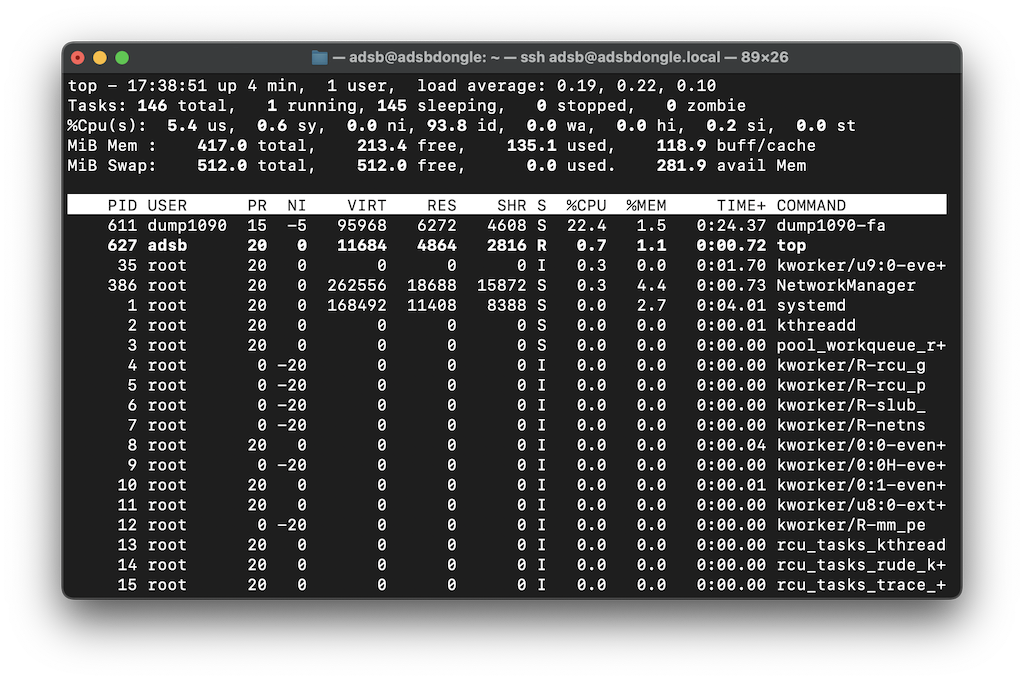
If no dongle is listed, first try another USB port. If that does not resolve the problem, check your connection to the dongle, power cables do not transmit data, look for a different cable or adapter. Enter top to see if dump1090-fa is listed as a process (press Q to quit). Create a symbolic link to the JSON data file which is generated every second by Dump1090-fa:
cd /var/www/html
sudo ln -s /run/dump1090-fa/aircraft.json aircraft.json
Final Step: Check the JSON file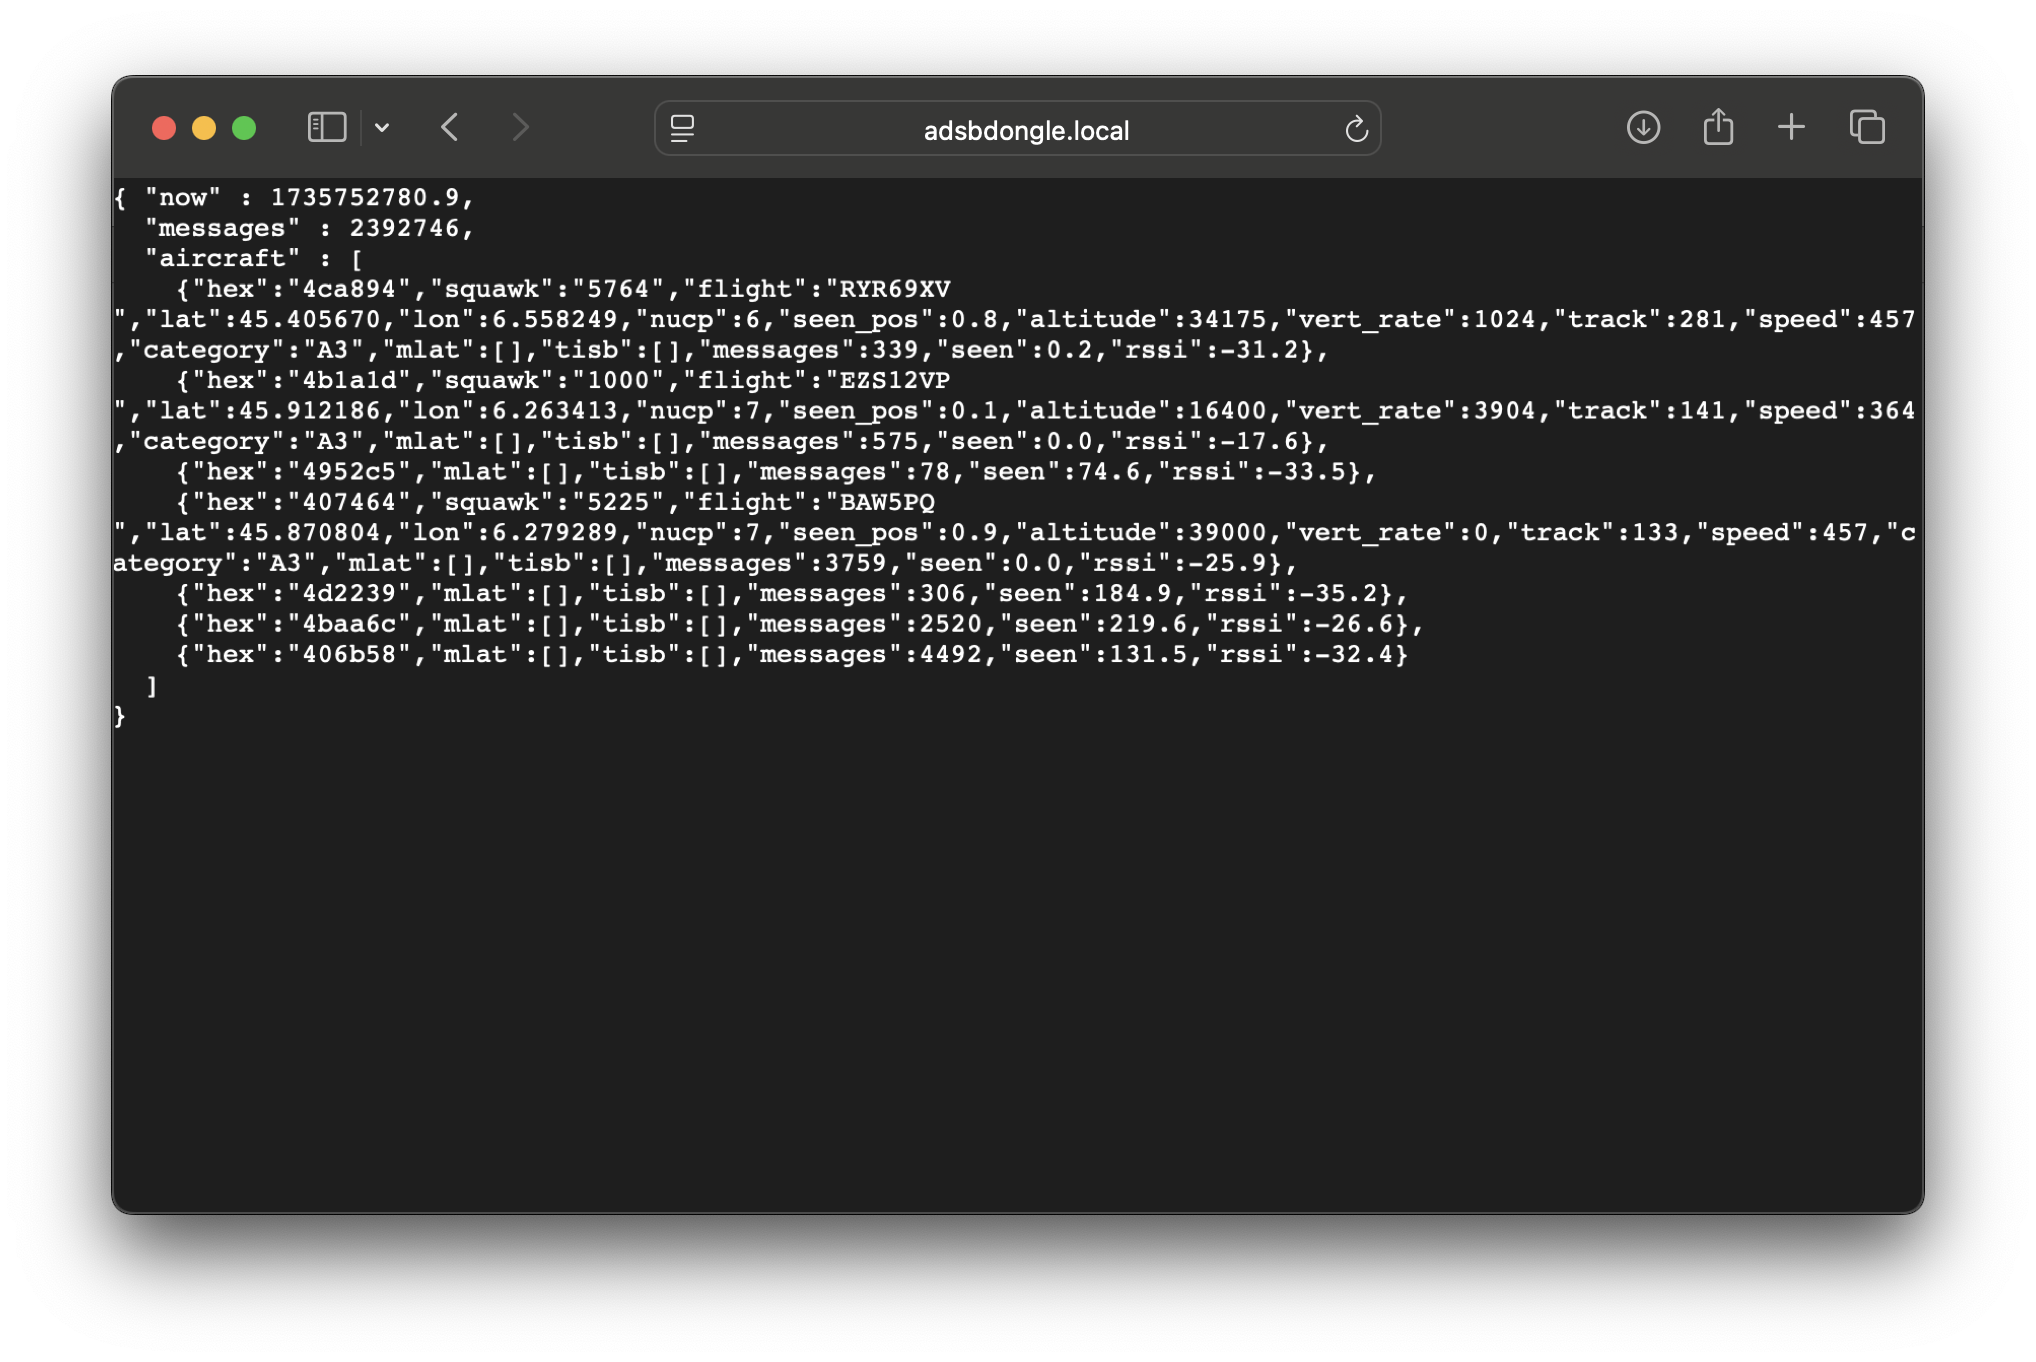
You're nearly there!
Open Safari on your mac computer and enter the URL to your radio receiver:adsbdongle.local/aircraft.json. If you see some lines with text, messages and numbers it means the radio receiver is working and you can access the json file! Now you can configure the App: Configure